A great talk can seem very natural and off-the-cuff when seated in the audience. But, behind the scenes, most speakers put a lot of effort into preparing a talk.
Preparation is everything, especially for those of us that aren’t natural public speakers. How you prepare will differ based on your strengths, weaknesses, and personality. Over the last few years I’ve found a process that works well for me, I hope that sharing it will be helpful to others.
There are three stages I use to develop a talk, each is covered in this three part series.
Part 2: Build Demos
This is the heart of a good tech talk, so it’s where I dedicate the most time and energy.
It is always great to watch a succinct, engaging, and easy to follow demo. Nothing says “time to check Facebook” like a demo that is hard to follow, takes too long, or fails.
Infrastructure
Just like any tech project, taking the time to invest in the right infrastructure is important.
I use Git for my demo code, so that I can easily reset to the starting source code each time. The less manual steps involved, the lower the chance you will forget something, or make a mistake, before the talk.
Here is how I typically set things up (though it can vary based on the demo):
- A single Git repository with all the demos in it.
- Starting point source code and the completed projects side by side, so I can easily swap to the completed source if the demo fails. An alternate approach is to have separate branches for starting/completed.
- A branch for each conference, so that I can make specific tweaks as needed.
- A local commit at the head of the branch with any passwords etc. so that they are there when I reset starting source code, but not public.
- One project per demo, and all projects in a single solution. This means less context switching for the audience (and myself).
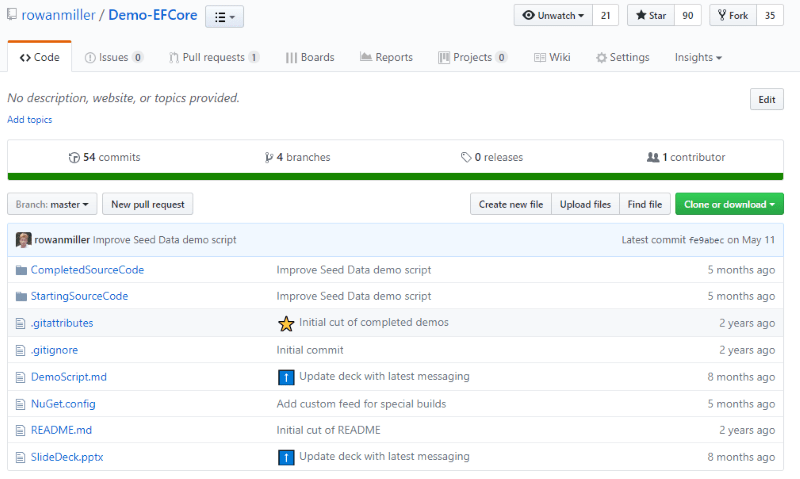
Image: GitHub repo setup for an EF Core talk
Building Each Demo
A good demo clearly demonstrates a single feature/concept in a way that is easy to grasp. If your demo combines multiple concepts, or runs for more than 10min, you are going to lose folks.
For most talks, simple apps are better than attempting something “real world”. Assuming you have a technical audience, fancy UIs often get in the way of your point. Because I’ve mostly presented on frameworks and APIs, my demos are typically console apps.
There are four phases that I use to build a demo.
- Phase 1: Proof of Concept
- Phase 2: Completed Source
- Phase 3: Demo Journey
- Phase 4: Polish & Script
Phase 1: Proof of Concept
I start with a rough code base that demonstrates the feature. I’m doing the simplest thing possible to make sure the demo I have in mind is going to work.
Because I’m often demoing new or pre-release features it is not uncommon to find bugs or limitations that I need to work around and it’s easier to adjust the demo at this stage.
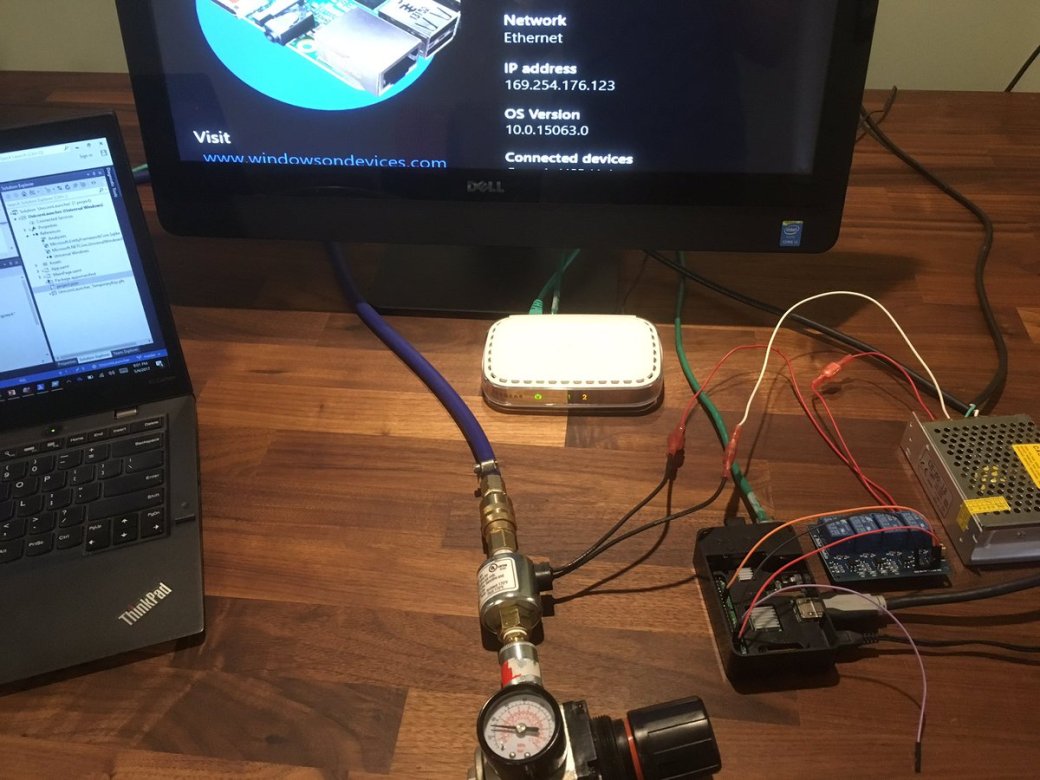 Image: Hacking together a proof of concept for an EF Core on RaspberryPi demo
Phase 2: Completed Source
Once I have a proof of concept, I turn it into something that is neatly factored and I’m happy to show on stage.
There are a few things I’m aiming for here:
- A small amount of code that clearly shows the feature, avoiding unnecessary concepts. For example, I’m not going to split the code base into separate projects or layers, unless it is specifically related to the demo.
- Neatly factored so that the code is easy to read. I’ll often avoid using fancy language features in favor of code that everyone in the room is going to be able to understand.
Phase 3: Demo Journey
Now that I have the code base I’m working towards, it’s time to work out what pieces of code I’m going to implement during the demo. This is typically some key lines of code that are central to the feature being demoed.

Image: Placeholder for code I am planning to add during the demo
They key is to have enough code that I’m not making it seem simpler than it really is, but not so much that the audience is going to be watching you type in silence.
The outcome of this step is starting point source code in my Git repo, that I can reset to each time I do the demo. I also jot down a rough bullet point outline of the steps I’ll perform during the demo.
Phase 4: Polish & Script
I now run thru the demo several times to make sure it works, and flows well. For a couple of these run thrus I will talk, as if I were presenting. This helps ensure the order of steps lends itself to bringing the audience along for the ride.
The bullet points from the previous phase become a detailed script of what I’ll do. I hardly ever look at the script, but it’s there if something goes wrong on stage. The script includes the steps to reset the demo each time, so there is no chance of failure due to forgetting something.
Having a script also makes it easy to come back to this demo for the next conference, or give it to someone else to present.

Image: One of my scripts for an EF Core demo
Consider Open Sourcing Your Demos
If you spend the time to make great demos, consider making them open source. Your audience will love having an easy place to grab the source code you showed. Plus other presenters can take your demos and reuse them, or build on them.
Here are some examples of “Talk in a Box” repositories I have, where folks can get my demos, scripts, and deck.
